Friday, September 28, 2018

Doodles with a needle and thread


Remember when we used to make book covers from brown paper bags to protect our school text books. We were not allowed to write in our books, but we were allowed to be as creative as we wanted in decorating those covers.  Many of my friends' covers were covered in doodles. Every inch had something interesting to look at.  When we got tired of that cover we could tear it off and make a new one and start all over with doodling to decorate it.
Well.... written on my cover had the name of the class, the period I had that class, and my name just in case it was ever in question who that book belonged to...  My cover lasted all year long because I was not a doodler!

I didn't plan to include this today, but a memory just popped up and I have to share ❤️.  My mom was a doodler when she talked on the phone. You know, during those lengthy conversations when family member or close friend needs a sympathetic ear.  Many times her side of the conversation was just her murmuring "umhmm" or "I see" or "pobrecito" which translates to "poor thing."  The thing that struck me most, was that my mom was listening with every ounce of her being. She'd be so intent on being there for the person on the other end of the line. 
There was always a writing utensil and a notebook near the phone because sometimes she'd have to write down a new address or phone number that was given.  But when the conversation would get deeper her hand would absentmindedly seek out the pen.  She'd end up dragging that ink tip along any piece of paper that was handy, usually the phone book or her personal notebook /phone book.  
Ok, my mom is one of my 4 regular readers. I can imagine by now she's shaking her head.  Maybe denying that she's a doodler.  That would be because she had a preferred shape, an arrow.
↖  ↗  ↘   ↙  ↔   ↡
She'd mix in a square or triangle once in a while, but it was usually arrows.  Arrows with one point, some with two points, some with a triangle point on one end and feathers on the other.
Often, she would retrace the shape she had just drawn, over and over, still giving support to the person on the phone.  Her focus on them so complete and the unconscious doodling meant that nothing was going to interrupt that phone call until that conversation had run its' course.  😊

My mom lives in Colorado. I live in Mississippi.  I try to call her at least once a week.  Our last conversation was 90 minutes long.  Whether she was doodling during that call, I don't know.  But I have no doubt what so ever that I had her utmost attention.  Thanks Mom. You're the best!!

~~~

K, my reminiscing moment is over, back to my blog... 
Remember, just a few years ago, the rage was Zentangle?  It's an art technique that's doodling with structure.  The idea is to fill in a space with repeating shapes or lines.  You could divide a larger canvas into sections and each section had a different design.
I put "Zentangle" into Google search and clicked the images button and here's the Zentagle images search result.  
 My attempt at this lasted about a week.  I'm just not a doodler!  But I remember thinking "what if someone applied this to quilting?!!"

And wouldn't you know it.  Before I had the courage to test my idea.  Next thing on the store bookshelves is Zen Quilting workbooks and ZenTangle for Fabric Arts, Quilting, Embroidery.  An added technique was painting the quilted fabric.

And then comes Karlee Porter with Graffiti quilting!  Talk about inspiration!!  
(... but I'm going to get a little side tracked here, I'll come back to Karlee Porter in a moment.)  Graffiiti is an art genre all its own.  We often think of the unwanted vandalism on public walls, the big puff letters or words scribbled on the wall. But Graffiti ranges from simple words to elaborate wall paintings.


The mural above was on the street side wall of the Lucky Town Brewing Company in Jackson, MS.  I thought it looked pretty cool. Pics are dated Feb'17.  I haven't been back since then, maybe it's still there.

This art piece was on the building that houses Stitcher's Garden quilt shop in Pueblo, CO. (pic dated Jun'17)
It is quite beautiful in person.  Those bright colors make me feel happy.
Do you think these are pieces fall into the graffiti category?

So, back to Karlee Porter's graffiti quilting.  This is more in the direction I want to pursue.
It has a groovy vibe, which appeals to my "Hita's Whimsy" nature very much.  Also, she uses arrows a lot in her designs.  I can't help smiling over that.
Have a look at the Google search for

I actually tried my hand at graffiti quilting a while back. I had forgotten about these pieces until they grab my attention while I was scrolling through my pictures looking for the walls.  These pics are dated Jan'17.  Looking at them now, I think there might be some potential there.

I took a class taught by Teresa Pino on painting a graffiti quilted piece..
The quilting was done by the instructor.  I did the coloring.  Umm, more practice is needed in this area...
 pics are dated Jun'17.
The pic below was my teachers sample.

Zen quilting and graffiti quilting are both machine quilting methods.  Machine quilting is fun, but what gives me most satisfaction is a needle in my hand and the motion of drawing the thread and making the quilt sandwich cinch together.
And so enters Free form Hand Quilting.  This technique is about hand quilting without marking the fabric.  You can start quilting with a pattern in your head, most common was Bishop's fan, also known as Baptist fan.  Or stitching can be started without any plan, just go wherever the needle takes you.   I've been wanting to attempt free form quilting for a long long time.  
I finally started a small sample size.

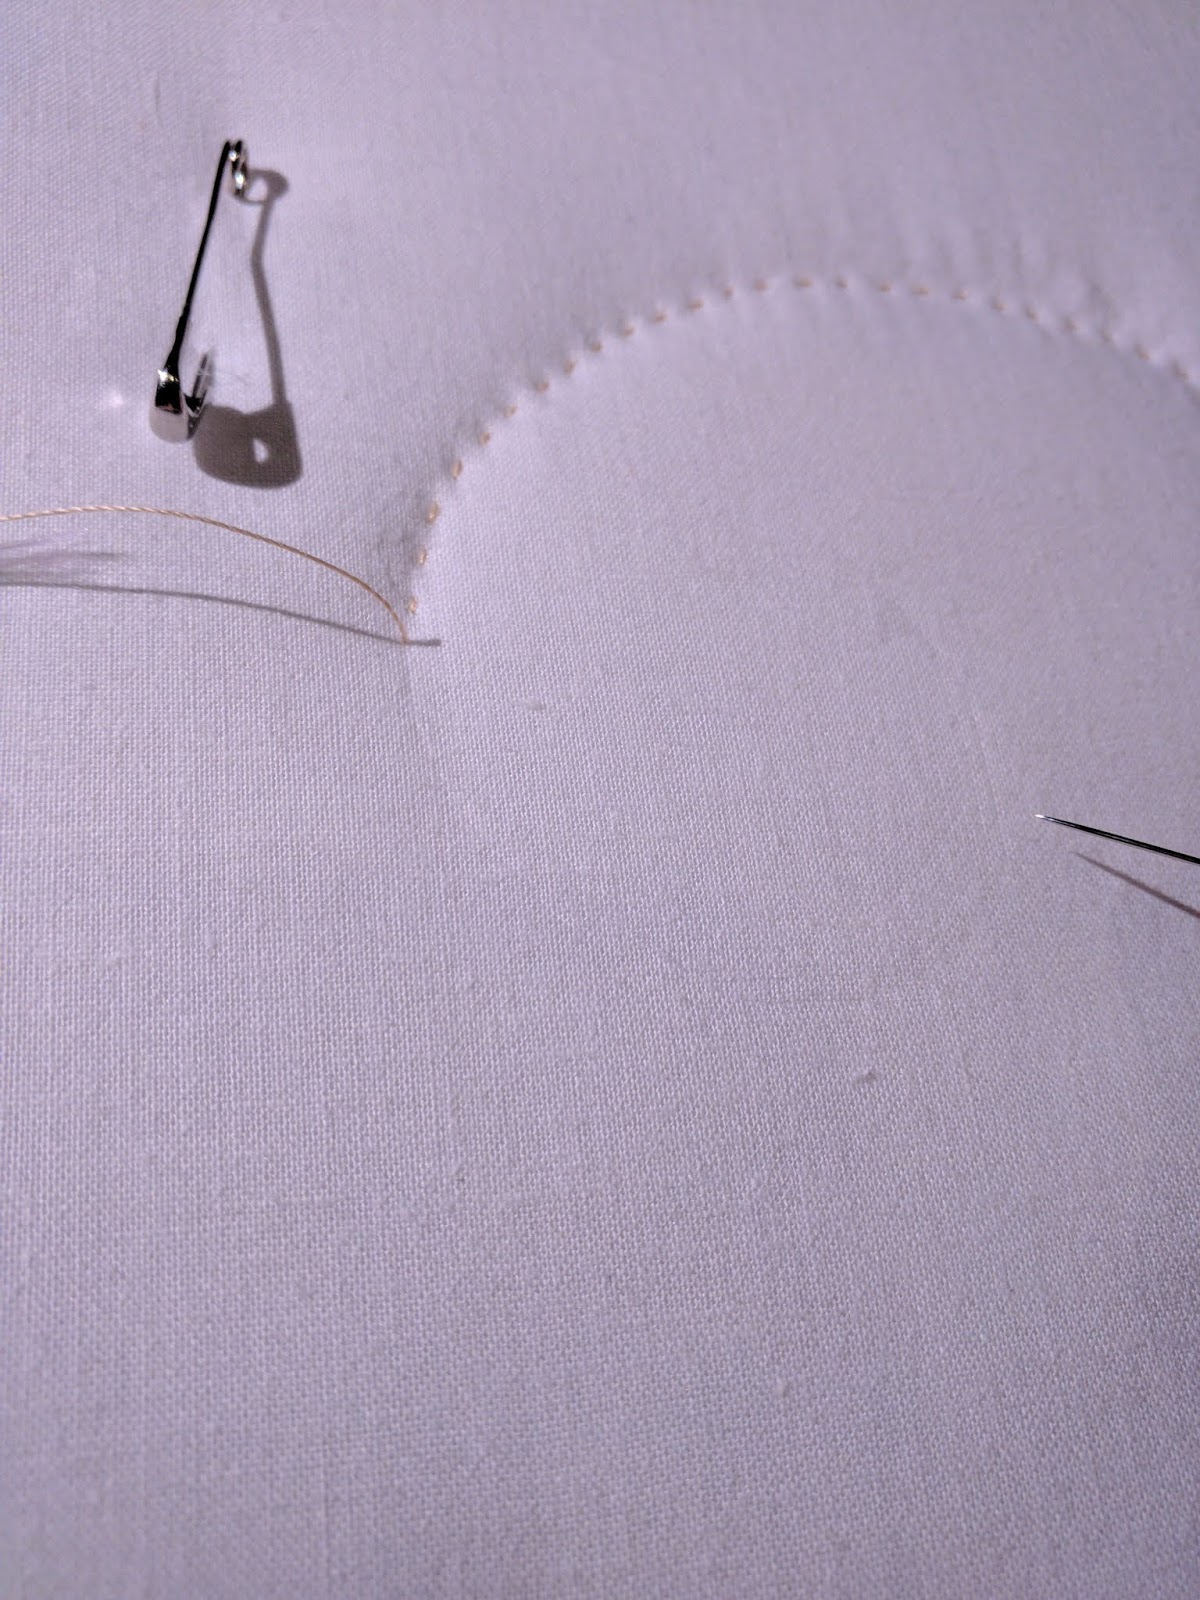
I started without much of a plan.  I made a quilt sandwich out of inexpensive bleached perma press cotton (basically muslin) for both top and bottom fabrics. And the batting is a poly batting that was left over from charity quilts.  And because I wanted to get to the stitching as soon as possible, I pinned basted the sandwich.

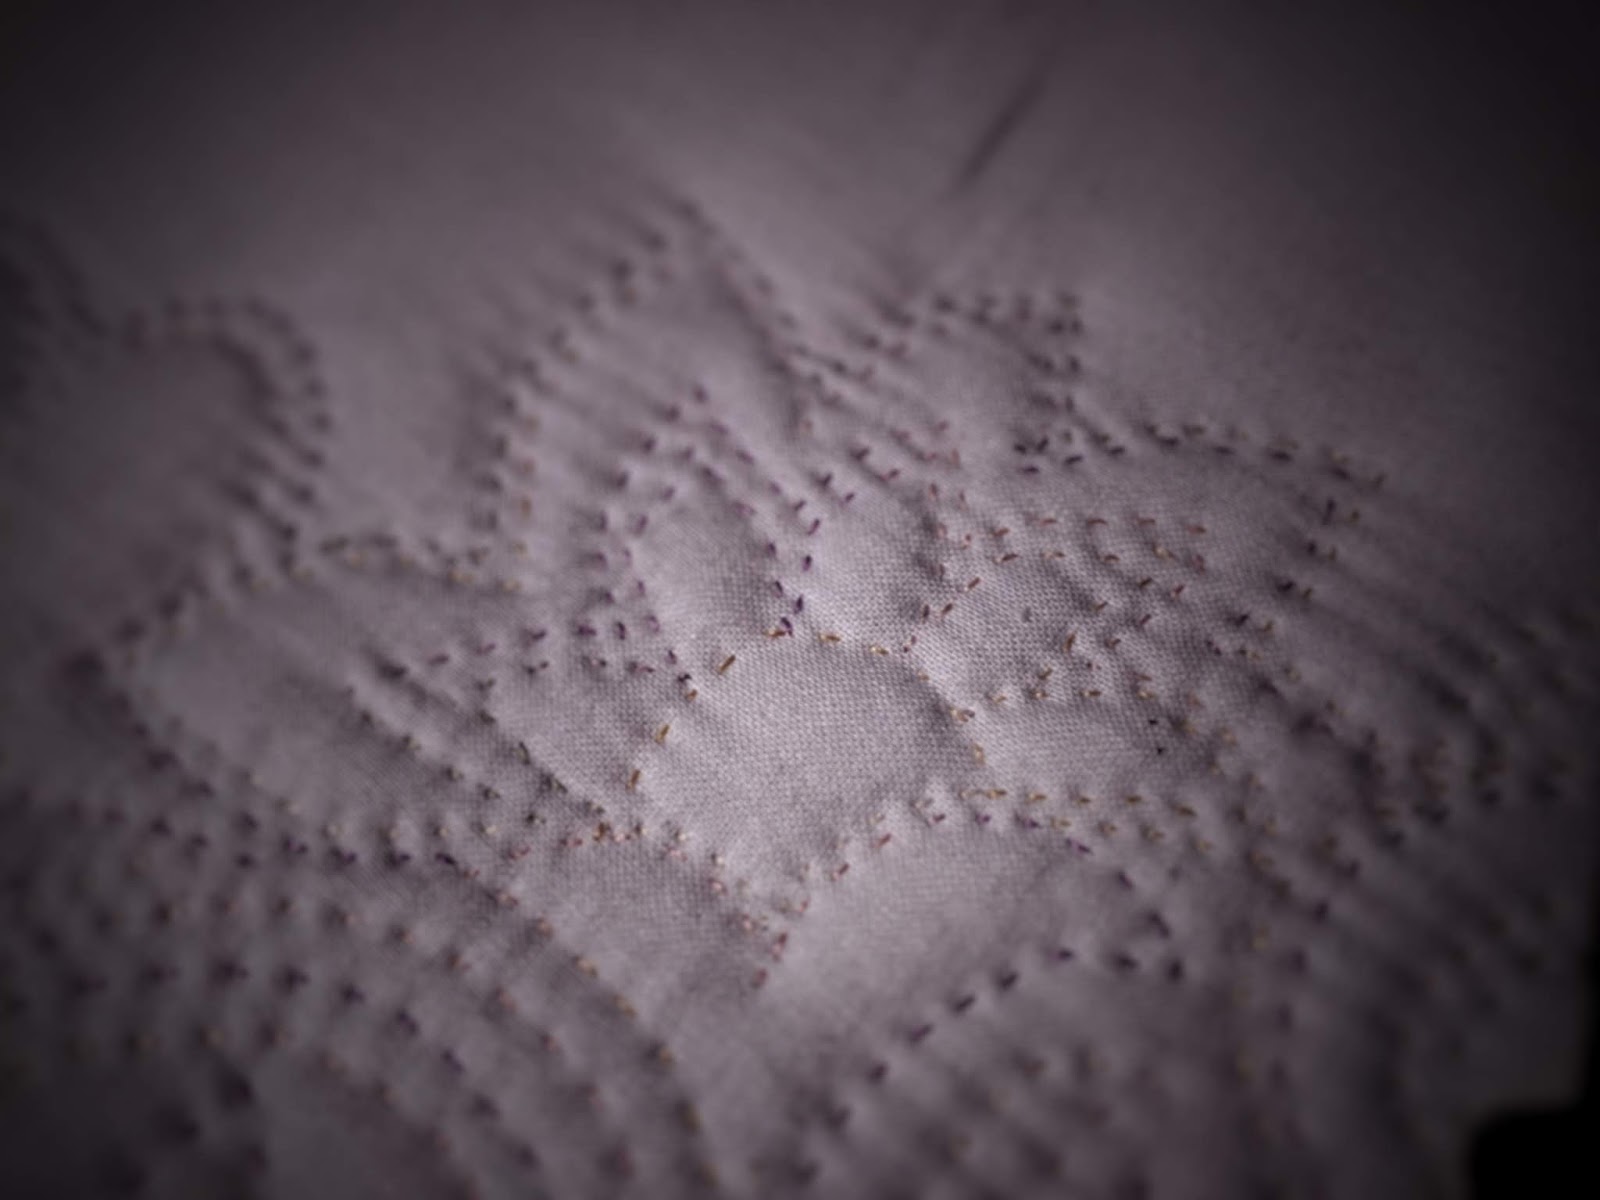
I thought I would start with a few wavy lines first, but somehow my needle went for triangles instead.

Freeform is intended to be no marking. But I'll allow using the top of my needle dragged along the fabric surface to help me shape my curves until I get the hang of it.
I was trying to catch the slight indention the needle tip makes in the fabric.
My favorite shapes are hearts and curly cues.  I haven't stitched a heart in yet.
Remember I said that in my haste I pin basted?
I think that was a big mistake.  The thread gets hooked on those safety pins.  
I've managed to make progress even with those safety pins being a nuisance.  I love quilted feathers.


I'm using a 30wt 100% cotton Sulky thread.  It's my first time using it for any project.  The label says for machine or hand use.  And I actually like it a lot for hand quilting.  I cut about 30" lengths from the spool. Aside from the basting pins issue, I haven't had tangling issues.  I don't see any fraying or fuzzies along the length as I work.  There is a bit of fraying on the end, probably a shorter length work eliminate that.  I just snip an inch off and continue working.


What I'm not so sure about in this project is the variegating color.  Maybe I should have used a solid.


Now this kind of doodling I can do!!  Slow and steady.  Each new shape comes at it's own pace.  There's no plan, just a couple of rules (which I am allowed to break if I want.)  One rule is no marking.  The other rule is every stitch stays, once it's in, it's in.
I'm not concentrating on perfect stitches. My goal is to doodle with my needle and thread!  I'm really liking this exercise.


Monday, September 24, 2018

Knitting needles loaded again.

I did complete the tasks in my last blog update.  It took a few more days than I had hoped, Monday turned into Friday really quickly.
The hardest task was letting go of the scarf.  Knowing my Sweetling wanted it and she'll take good care of it made it easier to let it out of my grasp.
Still, it was very difficult. So I've started another ZickZack Scarf by Christy Kamm.
I wasn't very thrilled with these colors.  The yarn was from the clearance bin in a yarn boutique I visited during our summer trip to New York.
The suggested yarn in the pattern is a 400 yard skein.  I'm keeping my fingers crossed that the 350 yards I have will get me close to a 60" scarf.

I have a bit of length now.  And I like how it's working out.
Possibly there's an added texture because of the subtle color changes.  That dimensional look is super cool!!


Saturday, September 8, 2018

Let go. Just do it!

It's finished!
Yay! I think it turned out quite well...
...after a bit of starch and blocking using a few pins...

Oh, yes. The pattern for this doily is found in the Annie's Crochet book Doilies with Symbol Crochet.   It's named Aquamarine Starcatcher, designed by Kathryn White.  I think I would like to make it again.  Does anyone use doilies anymore? Do I know anyone that wants one like this?  Mine measured 16" through the center from point to point.

This doily is designated for display on the coffee table in my Sweetling's dorm room.
Actually, my girl is quite surprised I'm letting it walk out the door so quickly.  I sometimes (almost always) have difficulty letting go of my works.  Like the scarf...
... finished last December, Goodbye 2017, and promised to her.  It took over 60 hours to knit up.  I think I got emotionally attached and it's still in my possession 😋.  (I AM going to give it to her with the doily. That will feel good to let go.)

I also have a set of gloves....
promised to a friend in WA.  The pattern for these are found in The Leisure Arts book Beginner's Guide to Crocodile Stitch. Designer is Lisa Gentry.  I wouldn't mind making these again too.
My attachment to these is different from the scarf.  These represent my friend.  The longer I keep them, the more love I can infuse into them.  I know, it's a silly notion.  They've been sitting on my coffee table, finished, for about a month now.  I'm sure they're as infused as they're gonna get and it's time to drop them into the mailbox!

And I have these tatted trims...
... measured perfectly for necklaces for my cousin's little girl.   They just need some fray check put on the ends then they can be put into the mailbox... but I have a fear the ends won't hold up and they'll start to ravel.  And my workmanship won't be as good as it should be...  My picture is dated June. Yes, I said JUNE! and it's September now!  It's definitely time for me to let go of these.

Procrastination, emotional attachment, fear of inferiority... Whatever the reason, holding on to things is holding me back.  It's crowding creativity.  So, I'm using you as my witness and I'm making it a goal to make a visit to the post office and be able to blog that's it's done on Monday.
Yep, it's time to let go,
Let my whimsiness out into the world 😉,
And make room so more can be put forth.
Like the commercial says, "just do it!"

Friday, September 7, 2018

A mess of stitches 😉

Another item for my Sweetling's room.
Working on the last row.  I've enjoyed every stitch. 

But it's a little unnerving at this point.
Because that looks like a mess of stitches!!
Here's hoping everything falls into place with a bit of blocking and starching.
Wish me luck!!

Tuesday, September 4, 2018

Looking from a new perspective...


If you have read my recent blog updates, you're aware I've been boo-hooing over not spending time at the sewing machine for the purpose of quilting.  I have projects with deadlines.  I NEED to get over this blockage.
I was having a conversation with a quilting friend.  My frustration must have been very apparent.  My friend Judy gently reminded me that my family life has been quite busy lately.  My daughter is a senior in a residential highschool.  Just that alone has taken a lot of my energies.  And Judy also reminded me that I do a lot of other crafts, like tatting and knitting, not just qulting.  

At the time, I heard my friend's words but they didn't sink in until I was putting the last stitches into the latest sewing item - a bed skirt for my Sweetling's dorm room.  She and her roommate decided to set up their beds bunkbed style and my Sweetling claimed the top bunk.   
I often help her carry her laundry and some groceries up to her room when dropping her off each week.

Their room has a homey feel with a feminine touch. Soft cream colored shear draperies hang in the window. They are dotted with small pale pink rose buds.  A small dorm-sized fridge tucked in one corner and a futon set along the back wall with a couple of decor pillows.  One of which, my Sweetling made last year. She drew a simple design and embroidered herself 🤗.

 I love those itty bitty flowers!

The painted cinder institutional walls are covered with photographs and posters.  It's quite evident these girls have incredible interests and big dreams for their future.

As I put down the grocery items I've carried up for her, my  eyes quickly scan her dorm room.  I try not to be obvious about observing their living space.
  The girls keep the room neat.  Except for maybe homework and a few items, everything is in its place.
  I'm especially impressed when I see the top bunk.  It's a reflection of my Sweetling's personality.   The carefully chosen duvet has been smoothed flat.  The top sheet perfectly folded over the duvet.  The pillows are propped just so. And bedding neatly tucked under the mattress.   Everything is looking so sweet..
.... Then my sensibilities are assaulted.  The hard violent contrast of the metal frame under my Sweetling's beautifully maintained sleeping area is just too much for me to handle.

Now, mind you, she hasn't said anything about this bothering her!  Not even when I mention a bed skirt would cover it up nicely.  She half-heartedly agrees when I offer to make one.
Knowing her the way I do, I HAD to make the bed skirt for her. Her only request was that it be white.
I immediately bought 10 yards of white perma-press muslin.  I know it's not going to take that much yardage but I can use 40% off coupon and what quilter can't use some more muslin in her stash??? (😉 That's always my thinking when buying fabric, "more will be a good addition to my stash.")
I pretty much immediately got to working on this project.  It took about a week from start to finish, getting measurements and figuring out my plan.
Ok, finally, we come to the real point of this blog update!!...
The perimeter of the frame is 240 inches.
I figured that the ruffle should be at a 1.75:1 ratio for a perfect gather to her eye. 

That equals to 420 inches of ungathered ruffles!
The sewing adds up like this:
420" of hem,
420" (times 2) of gathering lines,
240" attaching ruffle to the base,
240" zig zag over the raw edge to prevent fraying,
240" of top stitching...

That = 1,980" of stitching!!
Ok ok, turns out it's far less than the mile I was sure I had reached by the time I clipped the last stitching thread.  But believe me, when you're making ruffles, yards seem like miles!! It's a total fact, lol 😉.
 But that's when Judy's words sunk in.  I have to see everything I do.  Progress looks incredible different from a new perspective... Sometimes it takes "miles" of ruffles and a good friend to see it more clearly. 😄


Now.  THAT makes a total difference.
(Thanks for the before and after pics, Sweets. Love you!!)