Saturday, April 27, 2019

Designer's deserve recognition!

The 2019 board members of the Possumtown Quilters guild have presented a medallion quilt challenge to any members that want to participate.

At first I resisted joining in, because, you know, "I'm.not.starting.projects.this.year!"  Except, a lot of my quilting friends are participating and I don't want to be left out!

I had the hardest time picking a medallion design.  
I knew I wanted hearts.

I tried sketching something up for myself.  Nothing felt right.  I tried curly cues, paisleys, and hearts.  I added circle and leaf shapes to fill in.  In other sketches I sampled zigzags and wiggles and waves... None made me think "That's the one!"
 

Designing is hard!  Like anything you want to do well, it's a skill that takes lots of practice.  Apparently, I definitely need more practice!
Possibly, my limitation is I'm not seeing it in color.  I was getting the idea from my head onto the paper just fine but my eye wasn't seeing it in fabrics.  And my sketches are not inspiring me... (Yet! I'll hold onto them for a bit and let them steep for a bit.)

I'd love to stitch up an applique collage some day.   However, I'm already two rounds behind on this medallion challenge!!  I needed something less time consuming.

I saw this pinned in Pinterest:
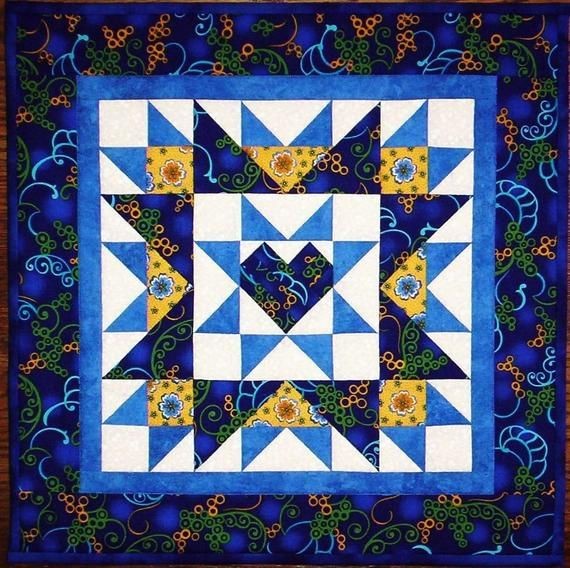
"Joyful Heart" designed and sold by DoodleTimeDesign
https://www.etsy.com/listing/84002852/joyful-heart-fat-quarter-friendly-mini
It has hearts and stars! 🥰
Isn't it perfect!

Ok! It looked simple enough, I mean common pieces - triangles and squares .  I'd easily draft my own version.  Over the years, I've made a few pieced hearts and more stars made with flying gease units than I could count...
I figured the center star had 2.5" unfinished corner squares.
That makes the flying geese unit 2.5"x4.5" unfinished.
And that makes the heart square a 4" finished unit.
Easy! So I pinned the picture without clicking on the link, without checking the designer's thoughts or notes or Etsy listing...

Instead, I drafted the heart square up for paper piecing. Which would have worked fine but I didn't like how this particular love bird print had to be cut for piecing.
I redrafted for a whole center piece and hand appliqued the top center point.  I used the clip and flip method for the corners.
So, after about three hours working it out, and two or three attempts, I finally had the center heart that I wanted.  


Moving onto the first star,  I accidently sewed purple corners on and completely lost my star.  After unstitching and putting the correct color in, this small 8.5" square is all I had accomplished by the time I had to stop to make dinner.  Doesn't seem like much!

The next layer is made in several steps.
I worked on side units after dinner.  I plan to use my 2.5" crumb squares throughout this quilt.  This seemed the best time to start putting them in.  I made oversized 2.5" x 4.5" crumb rectangles for the large center triangles before attaching the large focus fabric triangle.
Unfortunately, I don't have pictures of this step.  I was figuring measurements and having to get creative with the piecing.  Getting pictures wasn't a priority at the time.
Thankfully, my unit turned out perfectly. 🤗 And it was just after midnight.  I allowed myself to stop and get some sleep.

Apparently, I was eager to get this all put together, because I was wide awake at 5:30 and needing to continue.
I used crumb squares in the corner units, which are basically a 4-patches made with two half square triangles and two squares.
Do you see my mistake?

It was easy enough to fix 😉.

Now, to get to what I really I want to tell you.  Over literally 24 hours, I was able to figure out how to make the whole block without purchasing the pattern from the designer.  Good for me. 🤔  HOWEVER...
Had I purchased the pattern to begin with, I probably could have made it in considerable less time!  Maybe 5 hours, 6 tops.
Because, when you purchase a pattern you are skipping the whole trial and error step.  The designer has done all that work for you!  The designer takes the time to list all the precutting measurements.  You don't have to do the math!!  Patterns give you order and there's a certain confidence that all the pieces will fit together.
Plus, in this pattern, the designer is giving bonus optional center patterns - a Christmas tree, a pumpkin, and an Economy (square in square) patch!
And this particular pattern is only $5.00!!
It is really well worth the purchase.  Which I did after piecing the first side unit.  I was well on my way to being finished with the whole block, but I HAD to show my appreciation to the designer.  (I was also curious about her piecing techniques.  The pattern is all paper pieced.)
After skimming through the instructions, I think I'd love to make another Joyful Heart using the designer's methods.  I'll be sure to document and share my progress when/if I do.

And so I'm sending a huge "Thank You" to designer Ms. Faith Wellman and am sharing a link to her Etsy shop Doodle Time Designs.  You should have a look!  And here's a direct link to Joyful Heart if you'd like to make one for yourself 😉.

But right now I'm moving onto the next round of the PTQ Medallion quilt challenge - it must have squares!!  And I have a plan, a colorful plan! 😆🥰


Tuesday, April 23, 2019

Every quilt has a story..

The top is stitched together!
I'll call it Whimsy's Ribbons Quilt.
The pattern is a free download from Jordan Fabrics.  It's called Ribbons Quilt.

 Honestly, I don't know that I would have picked these fabrics. Maybe I would have chosen one or two to add to my stash.  Now I am very grateful to have experienced making this quilt!  (A big "thank you!" to Watana!!)

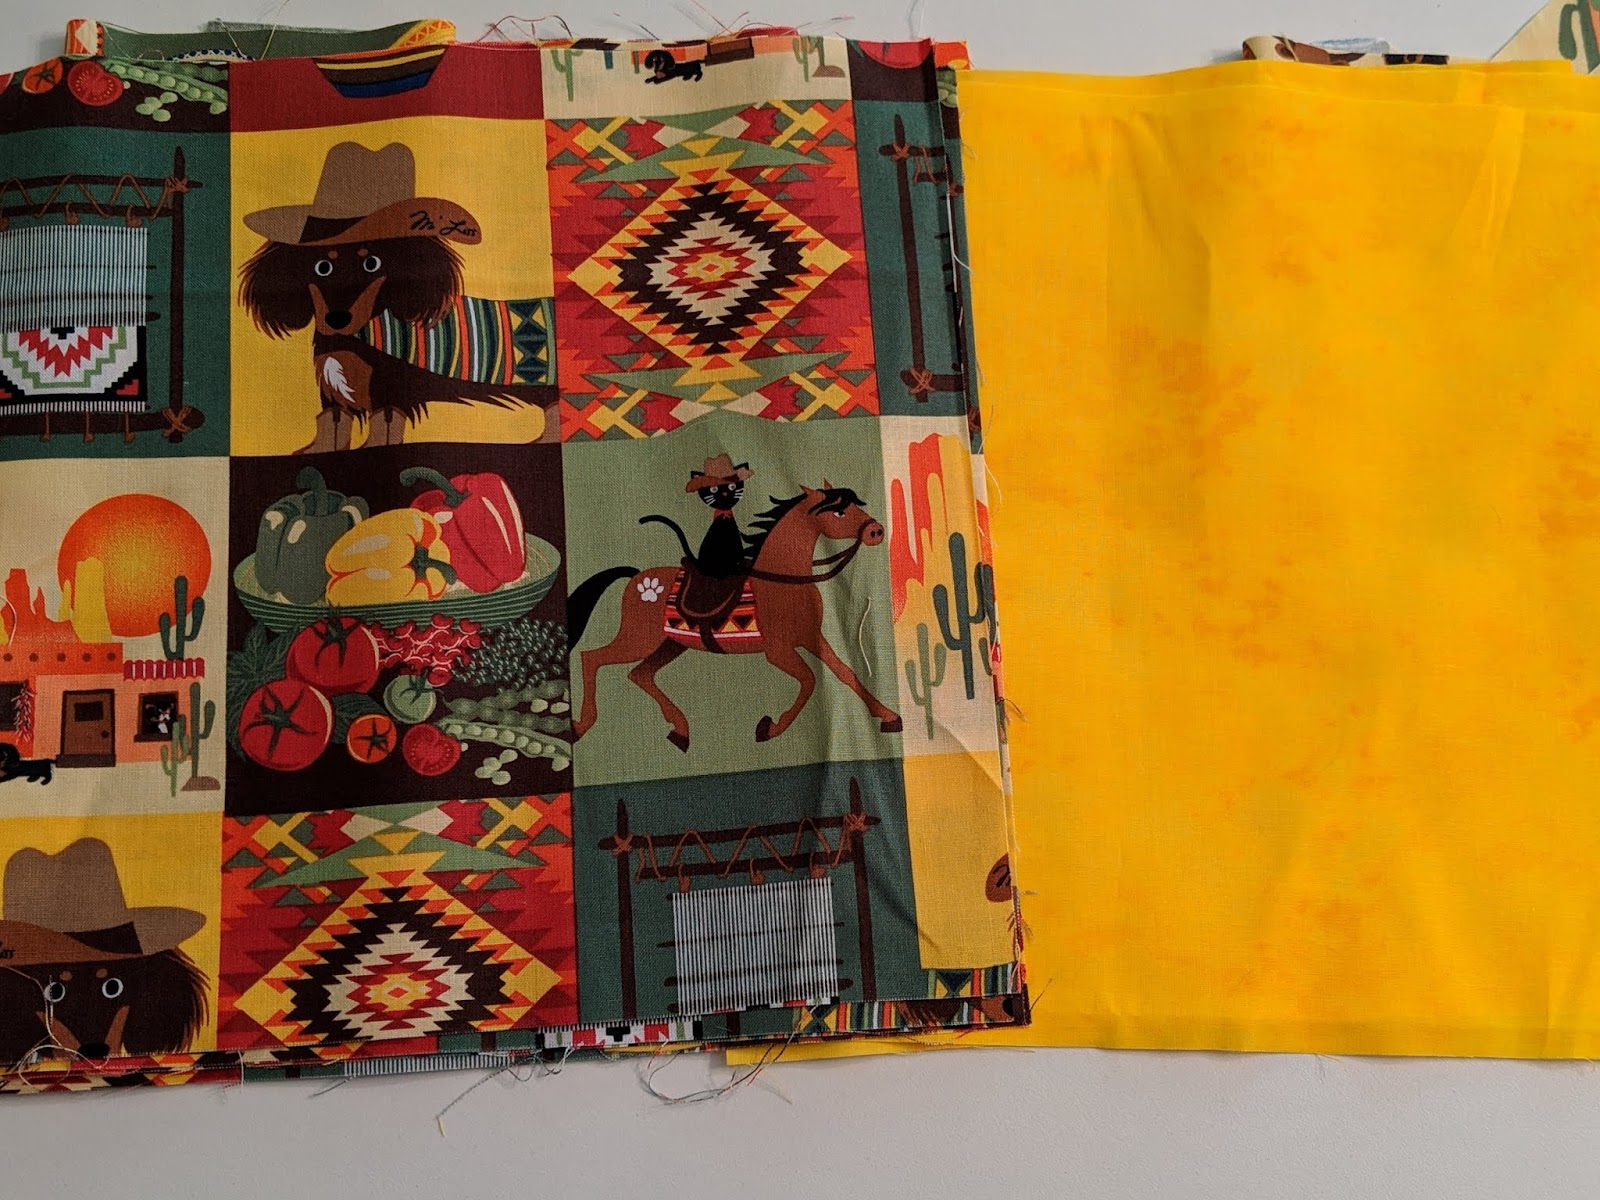
I had received a Layer Cake bundle at the last Wanna Bee quilter's Christmas party. 
A Layer Cake is a collection of precut 10" x 10" squares of fabric.
I didn't think to get a picture of my bundle before cutting it into pieces and sewing them together.  I was able gathered the leftover pieces for a sampling photo.
  There weren't left overs of these two.
 

I decided not to use the next two pieces.  The print was too big for the particular cuts I needed and I felt the yellow was way too bright.

I added my own cheddar and rust prints.

Life is fairly busy around my house right now.  But I become obsessed about getting this top done. I made sure to stitch whenever I was able.  Even if time only allowed one seam.

This next pic is how much I had put together during Watana Cantrell's Wanna Bee class.
I see two things I would change as I look at this picture now.
The first is that I would eliminate the column of dark blocks on the right side and add a column of cheddar ribbons to the left side.  That would've kept it symmetrical to the eye.
The second thing I would change isn't quite as noticeable.  I would have been sure to rotate the dark squares more.  To many of them are the same print pointing the same way with just a few rotated.  It kind of looks like a mistake to me.  
However, neither of these things bothers me enough to unstitch and resew 😉.
Besides, I think I've decided to keep this quilt for myself and it'll be part of MY story!

Saturday, April 20, 2019

Whimsy me!!

Yep. By the end of 2018 I had determined that 2019 was going to be my year for progress on projects already started and taking up space in my quilting room.  And so far, I've finished three projects, Whimsy's Doodles, Define Good, and a needle case. (However, none of these projects were already started and taking up space. But finished counts for something!)
I have completed a "Fractured" quilt top, pattern by Kathy Doughty of Material Obsession.  But that's only on Wednesdays at Maple Street charity quilting.  I go in for about 1 - 2 hours to stitch.  I've been working on this quilt top over a year!
My own Fractured quilt top is still pinned to my design wall... It was started sometime around Sept 2017 according to my digital pics log.  It's so close to being done.  I don't know what stops me.  This pic is dated Jan 2018.  That's really long enough on my design wall. I need to finish it this year!!

Ohh! I did make some 12" X 14" or so table mats!  One was a serious attempted at hoopless quilting for the first time.  I decided I am definitely a hoop / frame quilter.
In the process, I kind of invented a new way of quilting with an embroidery chain stitch.  Every line in the heart mat goes through the three quilt sandwich layers and stitches it all together.

Actually, I made several rainbow table mats/mug rugs.  It was an opportunity to practice free motion quilting on my domestic sewing machine.  Lol, now I wonder what to do with them 😋. Anyone want one?

And I've been attaching a piece here and there on the scrappy elongated hexagon top I'm hand piecing.

Besides the hexagon top, there's been no work done on previous quilting projects this year!!

Instead...
 I've STARTED projects!  Yes, this is the story of my life.  The first step to change is recognizing a pattern, right??  I'm still in the first step 😋.

1.  I've started a Bonnie Hunter "Geese on a String" quilt because I attended her class in Pigeon Forge, TN at Mountain Quiltfest 2019.
2.  And I'm going to participate in a PTQ guild medallion quilt challenge (it's another quilt top.)   I haven't actually started this one but it's there and I intend to do it.
3. I'm joining in on a PTQ "ugly" fabric challenge as well. (It will be a small wallhanging.)

And start #4 is what has me blogging today.
Ms. Watana Cantrell invites quilters over to her beehive quilting studio in Vernon, AL.  She calls her group the Wanna Bees.  Anybody that's interested in quilting is welcome.
This past December, each of us quilters received a beautiful layer cake at the Christmas party. (A layer cake is a precut stack of 10" sq pieces of coordinating fabrics.)  
Then she found an excellent layer cake pattern for us to make in the March class to encourage us all to use our layer cake up!! Isn't she wonderful?!!
The pattern, Ribbon Quilt, is a free download from Jordan Fabrics.
I have really enjoyed this project!!  I wish had gotten a picture of the layer cake before I got started.  There was so much colors and prints in it that I wasn't sure I'd be able to make it into something pleasing.
I did pull some light colored solid reading fabrics from my stash to get a better contrast.
By the time I left the Wanna Bees I had a piece I was very pleased with.
This top has definitely kept my interest.  Every thing about it speaks to me.  The over all pattern looks way more complicated than it is.  
It's all straight line piecing and there are no seams less than 5".  No "tiny" pieces in this quilt and no triangles. 🥰 I LOVE that!
And those TexMex colors and prints!! They grabbed my heart immediately.
I was able to keep some symmetry.  I like messy, but I do usually have a method to my madness.
Part of that method... Some of the blocks had a directional print. I used those for the outside setting triangles.  The horses, dogs, and adobe houses are upside up ☺️.

And I had a plan for the borders.  The rust colored fabric I used for the "ribbons" in the light colored blocks will be used for the 1st and 3rd border.
I was sure I'd be using this lighter sage green with geometric shapes for the 2nd border.  It looked like a perfect match to the geometric patterns in the colorful pots...
But look at that! 
Ugh. 
It does nothing for me. 
It's blah blah BLAH!!

~~~~

but this isn't blah! 🤗
It makes me want to add just a bit more like this maybe..
I love when I can add to a pattern in some way that alters the original and shows my personal touch a bit.

Ok! Time to go continue putting this top together! Thanks for letting me tell you about it.  Isn't it perfectly whimsy-like and me?!?! 😄